Point rodding – when is the best time to add it?

Modelling in a small space: adding point rodding at Tarawangan.

I have begun installing point rodding and associated infrastructure at Tarawangan. I’m not sure that there is an ideal time during a layout’s development for undertaking this task. If it’s done relatively early there is the risk of damaging the rodding and fittings as other work progresses. There is also the risk early on, as trains are run, that changes to the track arrangement become necessary. That was certainly the case at Tarawangan which had three significant track adjustments in the first year or so. Let’s also be honest: it is both a daunting and a tedious task.

I decided early on that I would add rodding after completing the majority of the scenic work. However, this approach is not without drawbacks; the greatest of which is having to disturb existing scenery in order to position particular details. Sometimes, drilling a small hole is all that is required. At other times, scenic material may need to be removed. This can be relatively minor, such as setting point rodding chairs, compensators, cranks, etc in place; or more extreme, such as cutting a hole into the baseboard to locate a signal. The risk, then, is of damaging the scenic shell more widely. There is also the issue of matching new work with existing scenery.

Some time ago, I added a lever frame and rodding in the Tarawangan yard. For this, I used components from the Anton’s Trains range. Sadly, with just single and double roller chairs available, that range is limited to yard settings.

Lever frame, cranks, compensator, rodding and indicator for the cross-over from yard loop to branch line. I removed small squares of ground cover so that each chair could be set onto the baseboard, then backfilled with fine dirt and over-sprayed with dirty grey. Despite that, the new work is still visible, but tolerable.

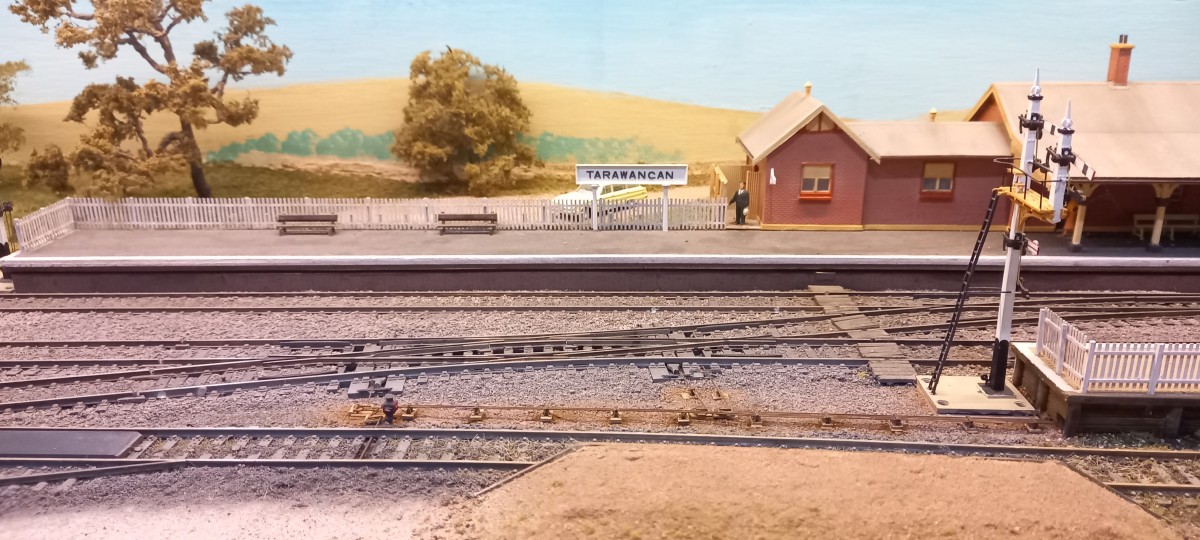
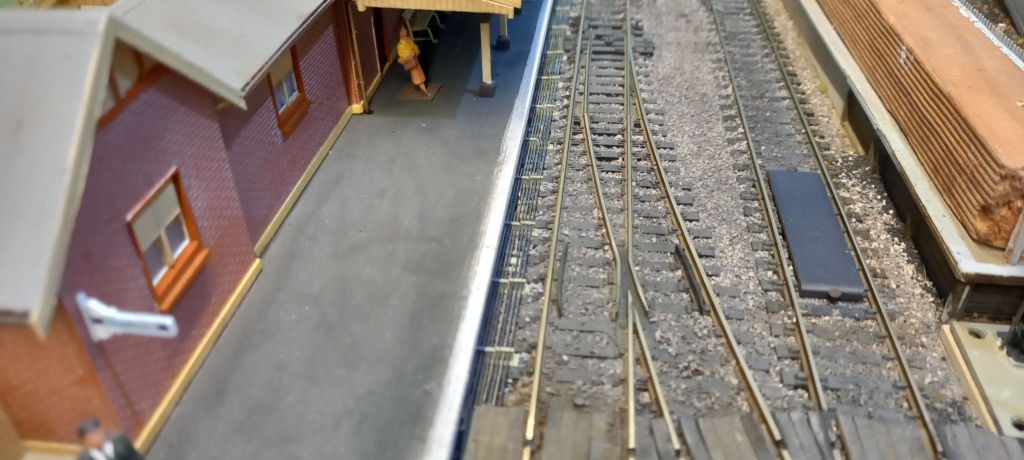
The track arrangement elsewhere at Tarawangan requires rodding runs of up to eight chairs across. Fortunately, Andian Models 3D-printed sets of 1, 2, 3 and 4 chairs. They are very fine representations too. Being resin, they can be easily adjusted to make chair sets of greater numbers – in my case, up to 8 wide. In the absence of alternatives, but also for consistency, Anton’s cranks and compensators are used. To get a feel for working with the Andian chairs and rodding, I began with a short run of 4-chair and 2-chair sets for the double slip on the down main and the loading dock catchpoint and indicator. I couldn’t get good reach and sight along the rail-side of the down platform to set chairs there and thread the rodding (another disadvantage of adding rodding later than earlier), so the fiction is that the platform signal box is beyond the footbridge (ie off-scene) and the shortest, straightest run is under the down platform and out beside the bracket signal.

Test-positioning angle cranks for the double slip and catchpoint prior to disturbing the groundwork.
Ground cover removed to expose baseboard along the rodding path. Bases of 2 x 3.2mm styrene support the roller stands and cranks. The bases are sufficient to raise the rodding to near rail height.
Medium stones used to backfill around the bases (painted dark earth). Fine dirt and cinders will complete the ground cover.
Ground work completed and sprayed dirty grey. Roller chairs, cranks and rodding fixed in place. Just need to paint the rodding dark rust.

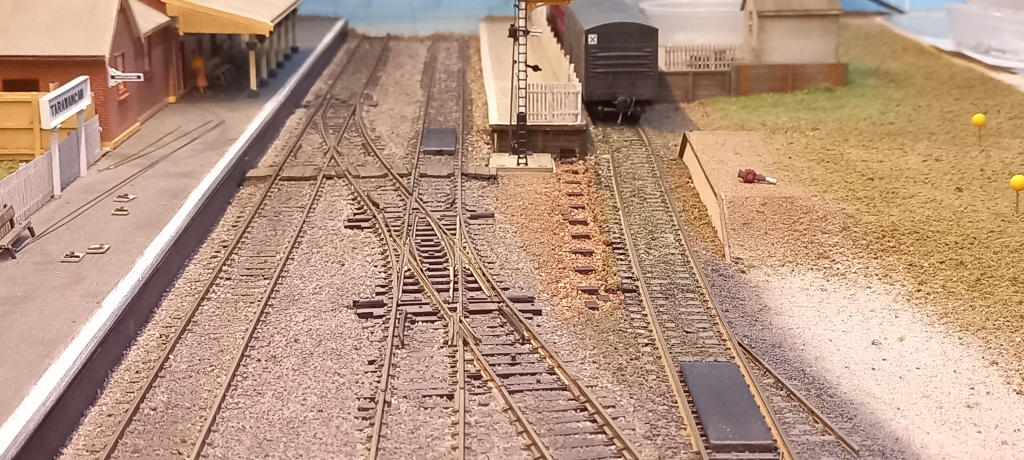
In hindsight, I should have reversed the rodding order so that the cranks were under the rodding more. If nothing else, the final result would have appeared neater. That said, the overall result is visually satisfactory. Working each rod through each roller chair is tedious but is eased by running a no 77 drill through each hole before fixing the chairs in place.

Rodding painted dark rust. Rust and dirt weathering powders dusted around bases and rodding – that will tone down with a misting of water.
From the usual viewing position.
And a board ramp over the rods.

So, in for a penny, in for a pound! Work has begun on the mainline run.

Eight rods in position, yet to be painted and weathered.
Rods beyond the board crossing have been painted. This side of the crossing chairs are in place and some rodding fitted.

More to follow.

Another world of modelling – 4

I have always had a soft spot for the Churchward 2-6-0 Moguls so my third 2mm finescale loco scratch-building project was 6305 (I built it in 1984). The 63xx’s were initially paired with 2500-gallon tenders and later 3000-gallon versions. I built the smaller tender as part of this project, but with the intention of swapping it for the larger version which I had originally built for the Dean Goods (Another world of modelling, September 30, 2021). The difference in finish between the loco and the tender highlights the evolution in my modelling, between the first and this loco. Nonetheless, the two locos are paired with their appropriately sized tenders for posterity.

6305 – GJ Churchward-designed 2-6-0 with 3000-gallon tender.

Both the loco and the tender have split-frame chassis so that power is collected through all wheels. Phosphor-bronze wires, soldered to the pony truck frames, rub against the underside of a PCB chassis spacer to act as both current collectors and springs. The scratchbuilt gearbox limits maximum speed to a scale 80mph. Idler gears drive the three coupled axles, thus providing good pulling power – 10 coaches or fifty four-wheel goods wagons. The motor fits within the tender and is connected to the gearbox via a driveshaft and universal couplings. Real coal is used to conceal the motor. Wheels, gears and motor were purchased from the 2mm Scale Association shop.

I added some pipework and fittings to the boiler backhead. Brake gear on tender also visible.
I think this view highlights the elegance of the class. Churchward’s locos tended to be visually appealing, with clean lines, as well as being strong and reliable runners.

The platework is .010″or .015″ brass sheet. The tapered boiler and smokebox are .010″ brass rolled to the appropriate diameter and soldered along the seams. The boiler and smokebox are filled with lead. The Belpaire firebox, folded to shape and soldered to .030″ nickel-silver front and back plates, sits over the scratch-built gearbox. The loco and tender footplates are fabricated from .005″ and .020″ nickel-silver sheet. The slightly wider, .005″ sheet is soldered atop the .020″ sheet to produce the characteristic GWR footplate.

Hand-turned fittings including chimney, safety valve cover, whistles and buffers. Note tender brake screw lever and tool box.

I turned the chimney, safety valve bonnet, buffers and other fittings using a mini-drill and files. The coupling rods are etched nickel-silver. The connecting rods were fettled from nickel-silver sheet. The pistons are a solid block of tufnol, filed to profile, and glued to the chassis frames. The pony truck pivots on a 16BA screw in the base of the piston block.

Smokebox and boiler fittings on the driver’s side.

The boiler/smokebox handrail is one piece of copper wire bent to shape and held in place with knobs of twisted wire. The boiler bands are hand-cut strips of ‘magic’ tape. The brake blocks and rodding were fabricated from nickel-silver sheet and strip respectively. The loco is a good runner and always looked the part on long trains and long runs.

Design a site like this with WordPress.com
Get started