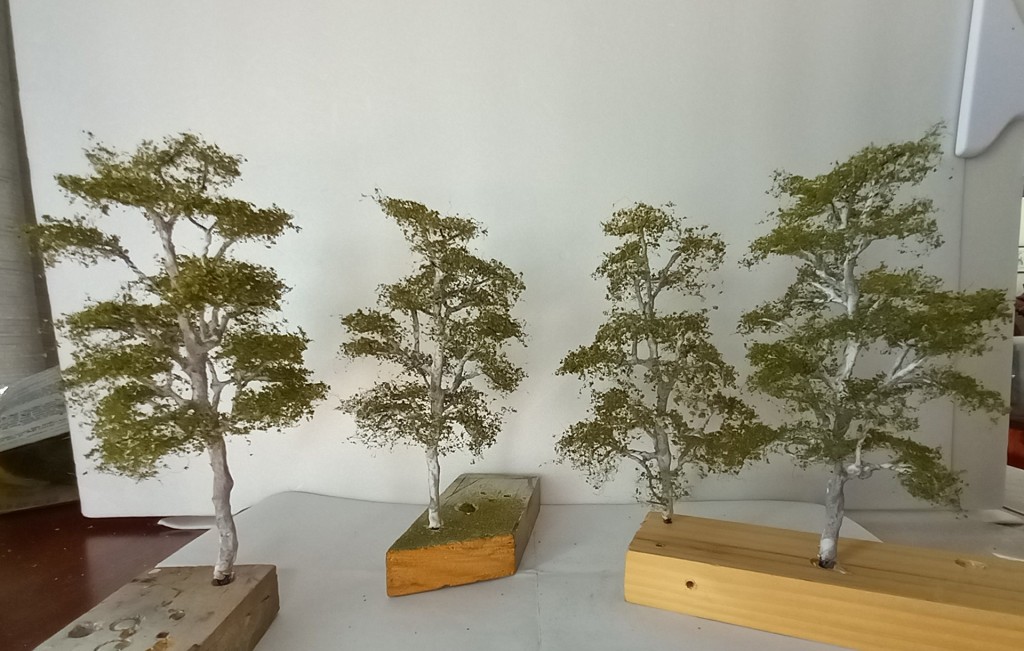
Recently, we have been belted by days of strong gales which make working outdoors both uncomfortable and potentially dangerous – a perfect opportunity to make a few model trees rather than risk being hit by flying/falling branches from real trees. The trees in the current batch are generic as I didn’t have a specific site in mind when I started. Ultimately, five have been used to complete the quarry diorama.
These were added to the wooded area at the end of the quarry line.I thought these might enhance a station precinct, but they now reside above Tunnel 1 (lower entrance to the helix).And one more tree to complete the bush area above the quarry. Although not a feature tree itself, the bark on this tree got a bit more attention because it is near the front edge and beside a feature tree. As an aside, the resilience of the construction method was confirmed when this tree took an inelegant swan dive to the floor while I was applying the ground foam foliage.The new tree on the left has successfully obscured three of the other new trees behind it, while the fifth new tree is just peeking out to the left of the feature tree.
When I started scenic work on the layout, I anticipated that I would need around 150-180 trees. This batch bring the total to 149. I think another twenty or so should be sufficient.
A source of inspiration: a stand of predominantly spotted gums viewed from 150-200m.
I am often asked how I make the trees for the Burrawon Branch. This video outlines the key steps in the procedure I use to make trees that are suitable for anywhere on the layout but, particularly, the middle ground and foreground.
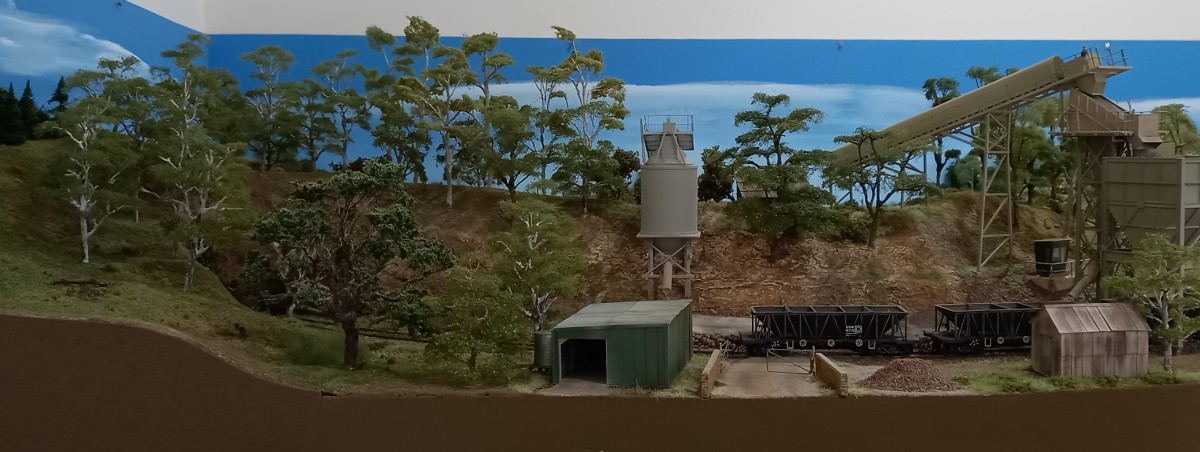
A pictorial update of work on the quarry extension.
The quarry extension has been the focus of attention over the last month, with tree-building dominating the past week. About ten more trees are required to complete the scene. Then, weathering and scenic details will be added.
Extension work begins. The cylindrical bin in its new position. Test siting the green shed.Quarry access road added. Green shed in position. Second shed in approximate position. However, this arrangement just didn’t look right.After trying various positions for the sheds, I finally decided that the access road was the issue. So, I made a card mock-up and moved it and the sheds around until the arrangement clicked.Progress increased after the road was re-positioned. I used part of the original road as a gravel storage site. Dressed stone walls at the entry with working gates. Rough rock retaining walls for the work site between the loaders. Piles of gravel fines from the main loader at the base of the bank. Some trees added around the three sheds.About twenty hand-made trees added along the ridge and around the cutting. Another ten trees should complete the scene. Low scrub and ground cover also to be added.
Come on a tour of both fantasy and reality as 4858 heads a pair of brake vans along the branch. 4858 stops at the Little River bridge and One Mile halt so we can view some nearby sights and structures. Brief descriptions are given about the construction of the structures. All aboard! https://youtu.be/d16s6cOax5I
Although the vast majority of trees on the layout are hand-made using wire armatures and poly-fibre foliage, I have also used other materials for trunks and branches, particularly for trees that are partially hidden or towards the background. I do not use them as foreground trees as they do not stand up to close inspection.
Spent Hydrangea blossoms: Once hydrangea blossoms have dried out, the petals are stripped off leaving a nice framework from which to fabricate trees with spreading canopies. I use poly-fibre sprinkled with ground foam for foliage and held in place with hairspray. I find them particularly useful as half-depth trees against the backscene or close to structures.
Hydrangea blossom trunk and branches
Hemp twine: I use hemp twine to fabricate trees that spread from the base, typically shrubs and bushes. I use up to five lengths of twine which I glue together at the base (about 5-10mm which will be inserted into a hole in the scenery). Once that glue has dried, I unravel the individual strands to approximate large and small branches. Soaking the twine in warm water and hanging it upside (and weighted down with clothes pegs) helps to straighten the strands and also reduces the overall stiffness. I spray the twine with artist’s acrylics to introduce some colour variation. Once everything is dry I spray the twine with contact adhesive and sprinkle ground foam all over. I usually use several layers of adhesive/foam and introduce different tones; starting with dark, then medium, then light to give the impression of sun reflecting off the outer leaves.
Shrub of twine and ground foam
Wire armature ‘bush’: Like the twine bush, the branches of these wire armature bushes diverge from the base. I use 0.7mm wire for these. Most branches are single strands. I spray the short trunk and branches with gray primer, then dry-brush highlights of raw umber and yellow ochre. The branches are sprayed with contact adhesive over which coarse ground foam is sprinkled. This is repeated until a good coverage is achieved. I allow everything to dry overnight, then spray the foliage with hairspray and sprinkle on lighter shades of fine ground foam. A final misting of hairspray sets everything in place.
Wire armature bush with coarse and fine ground foam
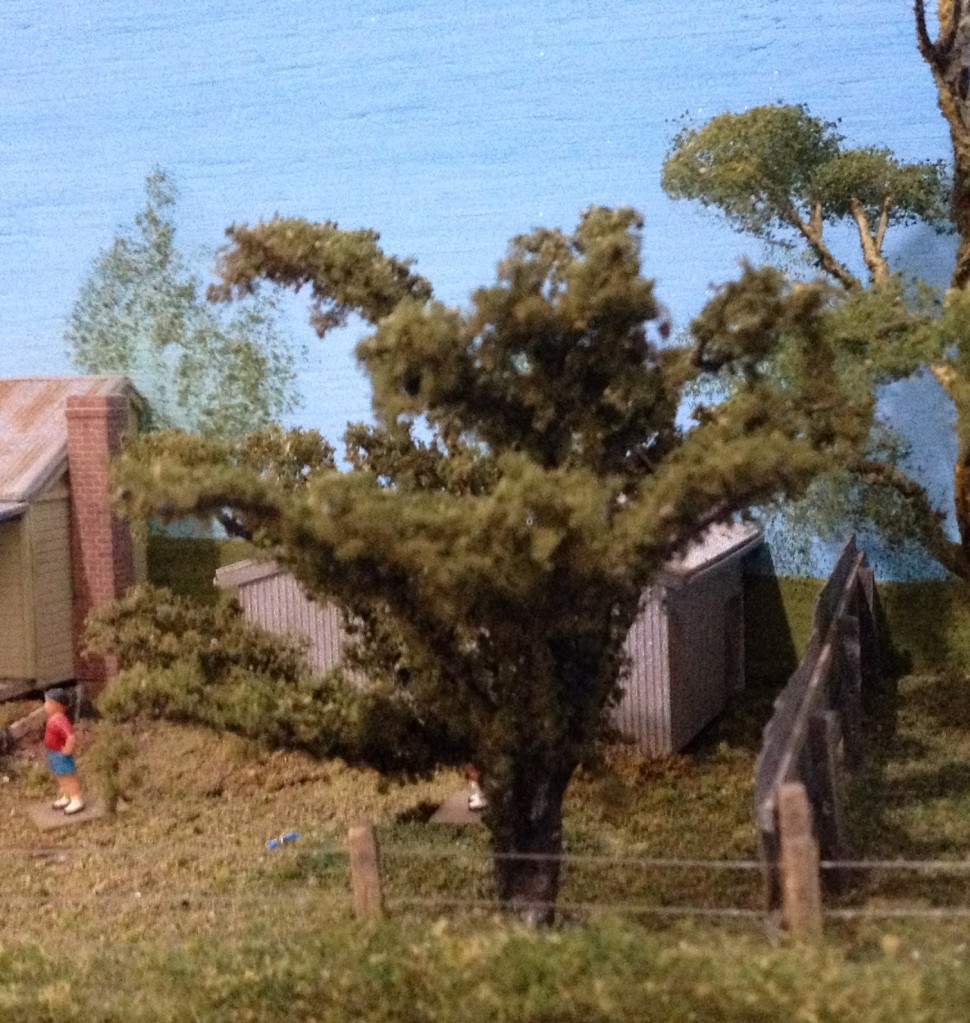
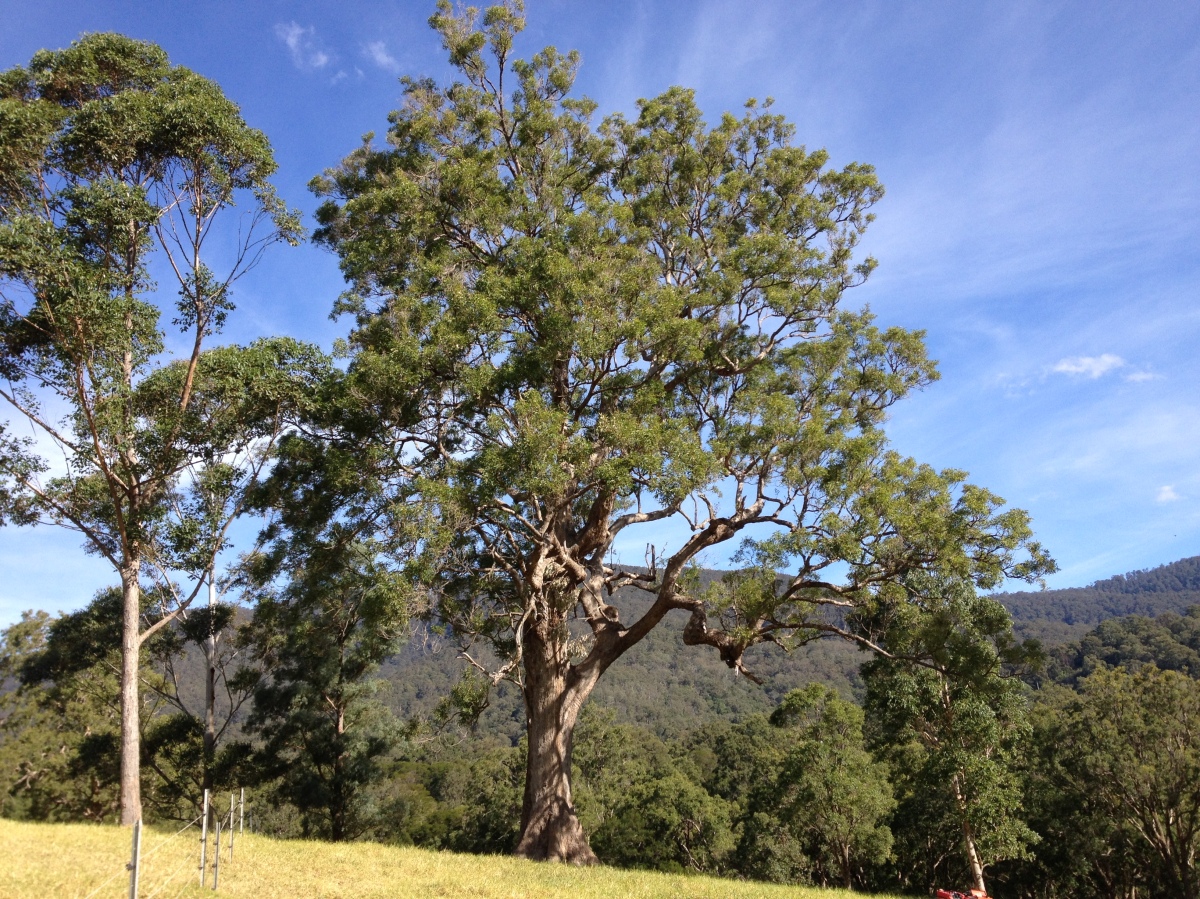
Most of the trees I make are intended to be grouped together, but occasionally a stand-alone tree is required. Sometimes, that is because there is room enough for just one tree, or a single tree is sufficient to create a view break. At other times, the required tree will be in the foreground. In such instances, the required tree needs to be worthy of its status as a ‘feature tree’. It needs to warrant closer inspection. Generally, feature trees need to have character, such as having more branches, convincing foliage, bark detail and colouring, and an interesting branch structure. On other continents, mature oak trees satisfy those requirements and so are often used by modellers as feature trees. There are a number of candidates in Australia, but where I live the apple gum – Angophora floribunda – also known as the rough barked apple myrtle is a big tree with similar character and majesty. We have many mature examples on our property, so finding a suitable subject is not difficult.
The real thing: Angophora floribunda.
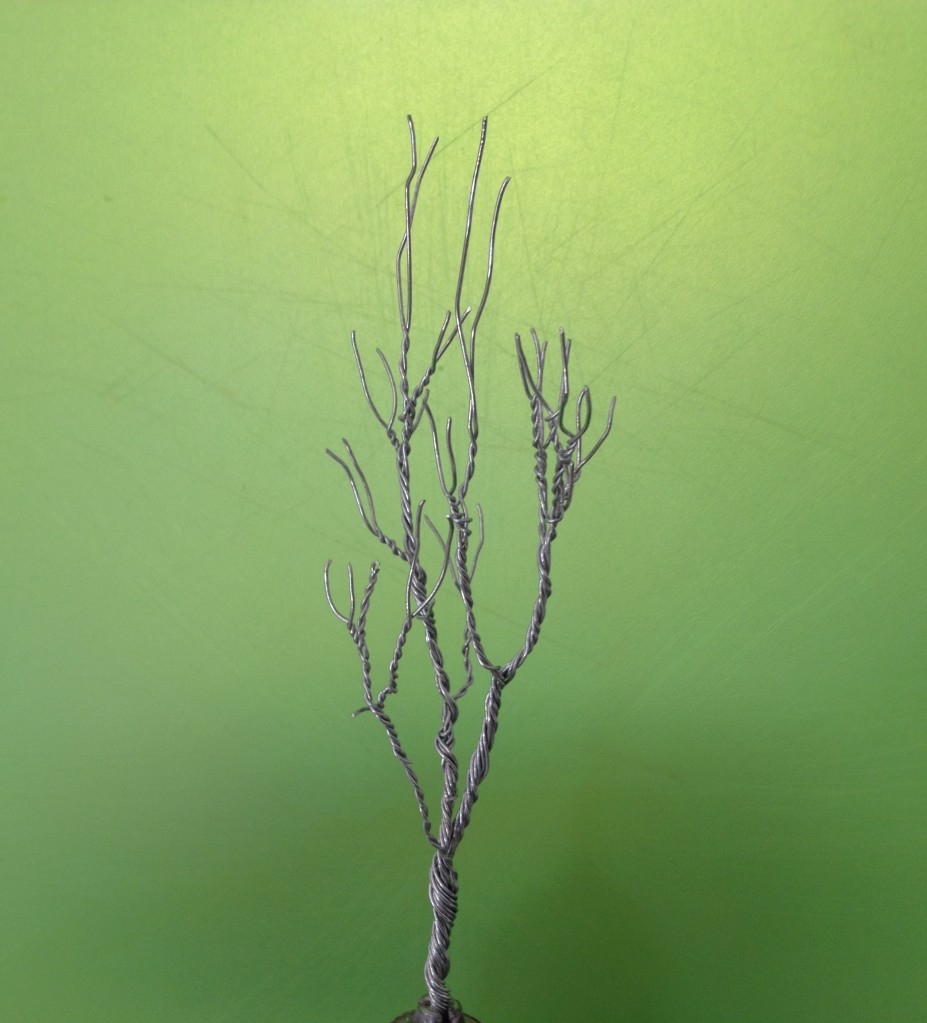
I do not try to model a specific tree; rather, I try to capture its character. In the case of mature apple gums, it’s their gnarly branches and spreading canopy that makes them good candidates for feature trees. I twist as many as 40 lengths of florist’s wire together for the trunk and branches. As I work my way along the main branches, I twist off several wires to make smaller, but still substantial branches. Towards the ends of those branches, I loop and twist individual strands back on themselves to create more single endings when each loop is cut. Apple gums sometimes have exposed roots, which I depict by twisting some wires away from the base of the armature. Once the armature is complete, and I am satisfied with the overall shape, I brush on multiple coats of ready-mixed Spakfilla, paying particular attention to the lower trunk and any protruding roots. A base wash of light gray is applied and allowed to dry. This is followed by a wash of India ink in isopropanol which finds its way into the crevices in the Spakfilla bark. Lastly, white, yellow ochre and raw umber artist’s acrylics are dry-brushed across the trunk and larger branches to highlight the bark texture.
I super-glue individual pieces of Woodland Scenics fine-leaf foliage to each branch ending – a tedious, time-consuming process, but the finished tree makes it worthwhile. I then spray the foliage with hairspray before sprinkling on various shades of fine ground foam.
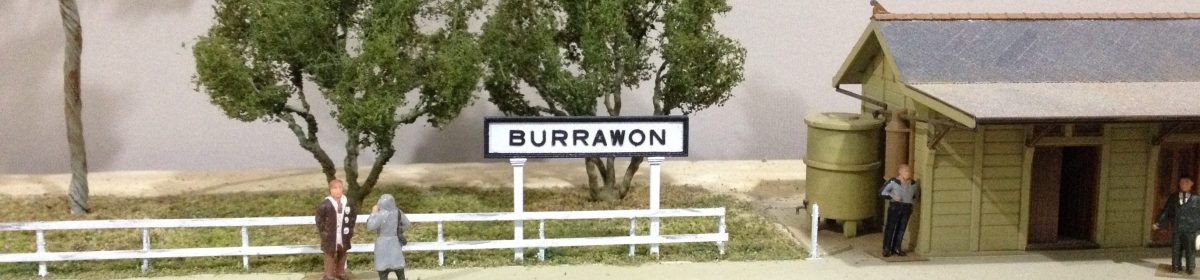
This example is destined for the Tarawangan station area where it will be adjacent to the backscene. Its purpose is to break direct view of the backscene and also to provide a visual division between the station area and the adjoining open country,This example provides a visual counter-point to the nearby silo and also shields the backscene from direct view.
I tried sprinkling static grass over the fine-leaf foliage on one tree. I thought it might give an impression of multiple branchlets. Instead, it made the fine-leaf foliage look dense (photo below). Perhaps, I should have used the static grass applicator so the strands stood up.
Static grass sprinkled over fine-leaf foliage causes the foliage to look tightly packed.
In an attempt to convey more open foliage, I gave it a touch of hairspray and a light sprinkling of fine ground foam. I think the result is satisfactory.
A sprinkling of light-coloured ground foam over the static grass helps give an impression of more open foliage.
Like most layouts, mine requires trees, not just as general scenic items but also as scenic aids such as disguising the transition from 3-dimensions to 2-dimensional backscene; breaking lines of sight; and as specific scenic features. As the layout is generally no more than 400-500mm wide, most trees are in the foreground and thus need to be reasonable representations. In fact, there are very few places on the layout where I could use the ubiquitous poly-fibre ‘puff-ball’ background trees (even if I wanted to).
A characteristic of being a retiree is that one often becomes time-rich while also becoming dollar-poor (in a modelling sense). In other words, I cannot afford the modelling dollars to purchase the number of trees required, but I can afford the time to make my own. By making my own, I can achieve a fairly consistent standard so no tree stands out from the crowd, although I do put trees with which I’m not satisfied out of direct lines of sight. Additionally, I can ensure that the trees I make are representative of the region in which the model is set. Living on a farm provides a rich source of modelling inspiration.
I generally use wire armatures to make tree trunks and branches, but also use string, twigs and flower stems. I use 0.7mm galvanised wire or 24 gauge craft wire or florist’s wire for the armatures – the former for large eucalypts and the latter for more bushy varieties. I use between one-and-a-half and two times as many lengths of wire as the tree’s height (in cm); eg I use 22-30 strands of wire for a 15 cm high tree, This gives both a suitable trunk girth and number of branches.
Large eucalypt armatures of 0.7mm gauge wire
After twisting the wires into a reasonable representation of the type of tree I’m modelling, I brush on diluted Spakfilla. I add enough water to the ready-mixed Spakfilla so that it can be brushed on like thick paint. I usually give the armature between 3-5 coats – allowing each coat to dry before painting on the next. The brush leaves streaks in the Spakfilla that are a good representation of bark. If necessary, I may spray a light wash of artist’s acrylic over the finished armature before brushing on some highlight colours. A final dry-brush of yellow ochre or off-white brings out the bark detail.
First coat of Spakfilla on a 24 gauge florist’s wire armature.
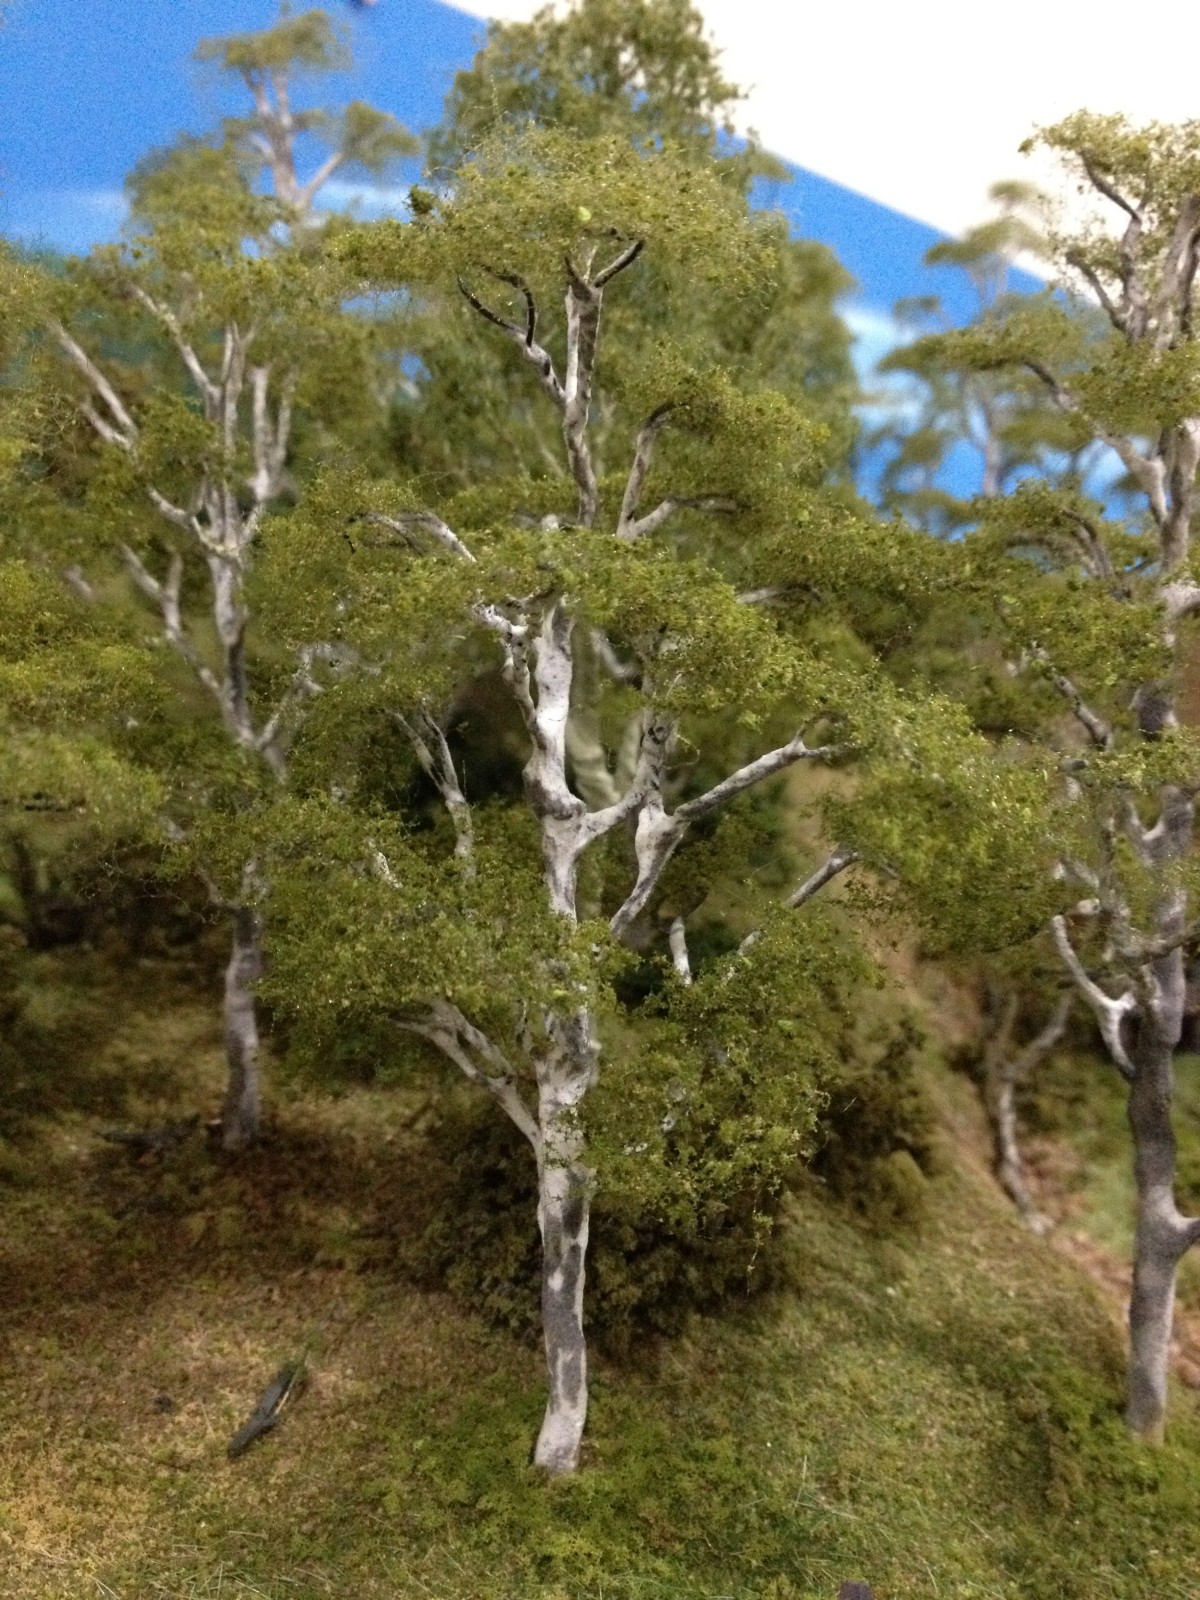
I use poly-fibre as the basis for foliage. I stretch the poly-fibre out until it is very thin, then spray it with cheap hairspray and leave it for a day or so. I have found that the hairspray softens the fibres which allows them to be stretched out even more and also to ‘fall’ more realistically from the branches. The poly-fibre pieces are glued to the branches with white glue. Once the white glue has dried, I tease the poly-fibre into a final shape, before spraying with hairspray and sprinkling coarse ground foam over the the tree. I may make more than one application of coarse foam depending on how the depth and coverage looks. I then sprinkle 2-3 shades of fine ground foam on the tree to add texture and colour. A final squirt of hairspray sets everything in place.
Completed tree with 24 gauge wire armature.A stand of completed trees beside the quarry siding.
Standing dead trees are a feature of the Australian bush. To date, the layout has just a few fallen trees. It’s time to rectify that. We have dead trees of most varieties of the trees on our property, so finding suitable candidates upon which to base some models is not difficult; eg those in the photo below. The key features of these two trees are that only large branches remain and their bleached colour.
Two standing dead trees in a riparian zone. The tree on the right is covered in the parasitic vine that killed it.
I do not model trees faithfully; rather I try to reproduce their general character, especially trees such as these two which are to be placed near the front of the layout. I twisted 0.7mm galvanised steel wire to create the trunks and large branches. Several coats of diluted Spakfilla were brushed on to hide the wire and to build up the trunk. I added some grey acrylic paint to the water used to dilute the Spakfilla. Thus, the Spakfilla coating was grey throughout – useful if the model is scratched or chipped at any time.
Twisted wire armature ready for Spakfilla ‘bark’.The tree on the left is completed. The tree on the right will receive several more coats of Spakfilla.
A light dusting of weathering powders completed the models. I am tempted to model the parasitic vine wrapped around one the trees.